

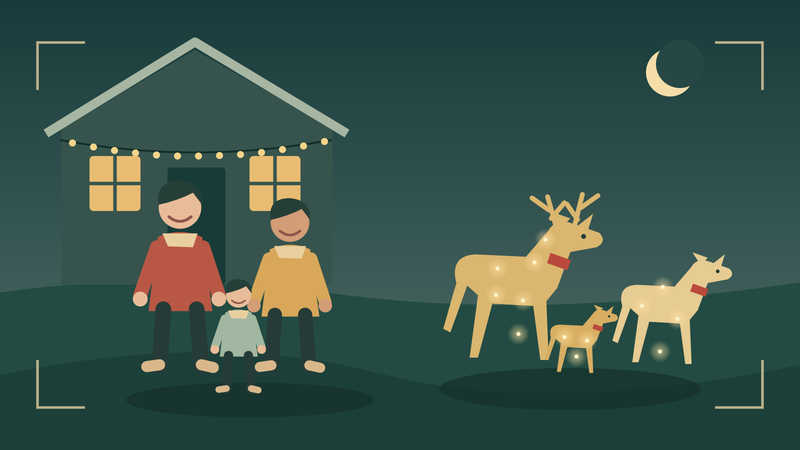
Outdoor Christmas reindeer can become the setting for a family photo, but the people need a place in the picture before everyone gathers outside. Start with who you want to include, choose a comfortable position beside or in front of the established display, and look through the camera once before bringing the whole group together.
The aim is a photograph you will enjoy keeping: familiar faces, a recognizable deer silhouette, and enough of the yard to remember this Christmas. A larger display is not necessary. One existing deer or a family group can provide the festive connection while your own family remains the subject.
Choose the people before you choose the pose
Decide who would like to be in the photograph and who will take it. Include the person who usually stays behind the phone: a willing friend can take the group picture, or you can use your device’s timer controls from a suitable supported position. Agree on that before everyone is ready, so the photographer is not the only missing family member.
Think about how people will feel comfortable together. A seated relative can belong at the center of the group rather than being squeezed into an edge. Use ordinary suitable seating in the people area, with standing relatives arranged around them. Leave the established display in its own space and keep the route to the photo position clear.
Try one of two simple arrangements
These are relationships within a photograph, not measured installation plans. Begin with the deer already set up for their intended use. Choose a usable place for the people and a viewpoint that includes both groups; do not move a decoration into a passage simply to fit the frame.
People in front, deer behind
This works when the yard offers some depth. The family occupies the nearer part of the picture, while the deer establish the Christmas setting behind them. Shift the viewpoint slightly if bodies hide every deer head. You do not need every leg visible, but keep enough outline for the display to read as deer rather than stray points of light.

People on one side, deer on the other
Try this when a side-by-side view is easier to find. Let the family form one group and the deer another, with a little visible background separating their outlines. The two groups need not have equal height or occupy equal space. A small family can share a frame with a taller buck without standing directly beneath its antlers.

Make a test frame with one person
Ask one willing person to stand where the family will be. From the camera position, check whether an antler seems to emerge from their head, a collar crosses their face, or a deer disappears behind their shoulder. These are viewpoint overlaps: moving the camera a little sideways or changing the person’s position may separate the shapes without rebuilding the display.
Then think about the smallest or seated participant. Their face might sit lower than the test person’s and align with a different part of a deer. Invite them into the test before everyone settles. Check the edges too: leave breathing room above heads and antlers, and decide which deer you actually want in this particular photograph.
If the view feels crowded, choose a simpler relationship. A family portrait with one clear deer can tell the story better than a frame that squeezes in every decoration. For changing the deer group itself, use our buck, doe and fawn arrangement guide; this test is about how people appear beside an existing display.
Use the deer’s outline to frame the occasion
Look at head positions as well as finish. An upright buck creates a taller visual line, while smaller or lowered-head figures occupy different parts of the picture. Compare those shapes from your intended camera position, not only in a product close-up. The two official examples below show different appearances; neither image is a record of a family portrait session.
A white family with varied head positions
The HOYECHI HYC8039-W four-piece white reindeer family includes an antlered buck and smaller figures with different head positions. In a portrait, those differences give you several possible background outlines. Choose a viewpoint that keeps the white figures distinguishable from the surroundings and the family’s faces clear.

A brown woven-look family with plaid accents
The HOYECHI HYC8039-B four-piece reindeer family offers brown woven-look forms and red plaid collars. These details can remain part of the picture without requiring everyone to dress to match. Look first for a clear family grouping and recognizable deer shapes; clothing can stay personal and comfortable.

Take one posed picture, then one relaxed moment
Make the straightforward photograph first: everyone who wants to participate is visible and looking toward the camera. Then try a second frame with the family looking at one another or at the display. There is no need to ask children to touch a deer or perform a particular reaction; a shared glance or conversation can be enough.
Keep the session unhurried and accept that someone may prefer only one picture. If a family member does not want to appear, they might enjoy choosing the frame or taking the photograph instead. The point is to include people in a way they welcome, rather than complete a compulsory holiday pose.
Keep the picture that feels like your family
Review faces as well as lights before everyone goes inside. If the deer look bright but faces are hard to see, try a moment when there is still some ambient daylight and take another test. For device-specific comparisons, continue to our guide to photographing lighted reindeer at night; you do not need to solve every camera setting while the family waits.
Save the favorite photograph with the year and a short note about who was there. Ask the people pictured before sharing it publicly. If you also want to invite neighbors to enjoy the display, our neighborhood lights-night guide covers that separate occasion.
Already happy with your deer? Use them. If you are planning a new display, browse outdoor Christmas reindeer and compare the actual group shapes with the space you want to leave for your family. A memorable picture comes from the people and the moment, with the decoration helping tell the story.
Family-photo questions
Can we use the outdoor Christmas reindeer we already own?
Yes. Start with the display you have and find a comfortable viewpoint for the people. A single recognizable deer can establish the festive setting; a portrait does not require a larger set or extra decorations.
Should people stand beside the deer or in front of them?
Try both with one person first. People in front can work where there is depth; a side-by-side arrangement gives each group its own part of the frame. Choose the view that keeps faces and deer outlines distinct.
How do we stop antlers appearing to grow out of someone’s head?
Check through the camera rather than only from where the family stands. Shift the viewpoint or the person’s position within the usable area until the antler and head no longer overlap. Check again for shorter or seated participants.
How can a seated family member be included?
Arrange suitable ordinary seating in the people area and bring the rest of the family around them. Check their face from the camera position before finalizing the group. Everyone does not have to stand at the same height.
What if everyone and the entire deer group do not fit?
Prioritize the people. Include one or two clear deer, or take a family portrait and a separate full-display photograph. Avoid forcing every object into one crowded frame.
Can a decorative deer or decorative sleigh be used as a seat?
Do not use these decorations as seating or climbing props. Use proper seating for people and let the deer or sleigh remain a separate part of the scene.
Does the family need matching clothes?
No. If you enjoy coordinated colors, use them, but recognizable faces and comfortable grouping matter more than an exact match to a red collar or gold finish. Take a test image if you are unsure about visual overlap.
What if someone would rather not be photographed?
Respect that choice. They can help choose the composition or take the picture if they wish. A family tradition can leave room for different ways of participating.
What if the lights look fine but faces are hard to see?
Try the group photo earlier, while some daylight remains, and compare one test frame. Follow the linked night-photography guide for phone-related adjustments rather than adding more decorations to solve a camera problem.


